I recently needed to build a Microsoft Teams bot to take simple commands and update a database. There are plenty of materials out there on this: tutorials and blog posts (like this one), an SDK, lots of docs from Microsoft, and yet I felt that all were either over-complicating the problem or lacking crucial information to get the job done. In large part for self-interested reasons, I’m taking the time to compile what I was able to figure out in a quick breakdown.
Generally, you will need only two things:
- An API endpoint that takes a POST request and returns a response in a specific format.
- Teams permissions (or access to someone with them) to set up an outgoing webhook.
The API Endpoint
We’ll cover this in three sub-sections:
- Receiving the Teams request
- Authentication
- Returning a response
Receiving the Teams Request
You’ll need to be prepared for an incoming message formatted like this. This is just an illustrative screenshot as your version of Teams or host for your API endpoint may result in a slightly different format.
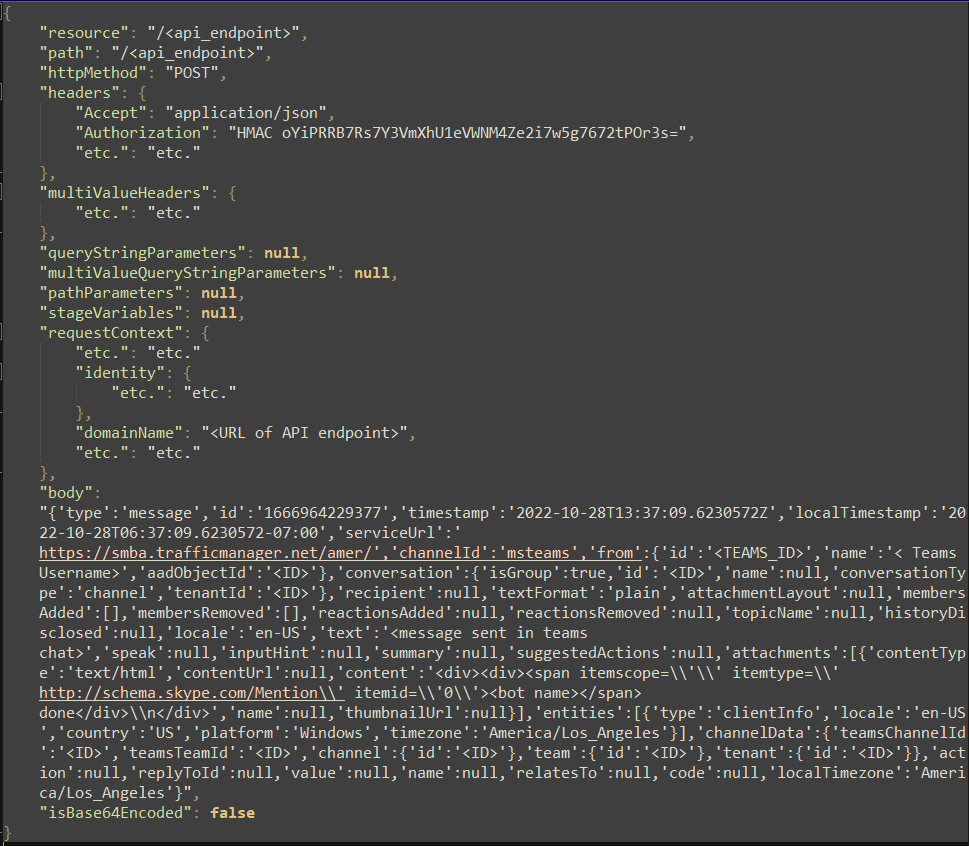
Most of the data you’ll need from this request is in the body, which is currently a JSON string. In Python, you can simply use json.loads(body) to get this into a much more manageable dictionary structure. Then you can use the text from the message, timestamp, or any other data in this data structure that is useful for you.
Authentication
As we’ll see very soon, when you set up your outgoing webhook in Teams, it doesn’t have an option to add an API key. This means that anyone with your API endpoint address can trigger the Teams bot unless you block requests or authenticate in some other way. What Teams does provide is a webhook security token.
This Python function will get the HMAC token sent from the POST request event and use the bot’s webhook security token to authenticate that the POST request is coming from a valid source. This example assumes that the security token is stored as an environment variable on the API’s system:
import os
import hmac
import hashlib
import base64

def authenticate_message_is_from_teams(event: dict) -> bool:
    """Authenticate that received message is from Teams"""
    security_token = os.environ.get('SECURITY_TOKEN')
    try:
        hmac_check = event.get('headers').get('Authorization')[5:]
    except (TypeError, AttributeError, IndexError):
        return False

    digest = hmac.new(
        base64.b64decode(security_token),
        msg=bytes(event['body'], encoding='utf-8'),
        digestmod=hashlib.sha256,
    ).digest()
    signature = base64.b64encode(digest).decode()

    if hmac_check != signature:
        return False

    return True
Returning a Response
After processing the message/command and authenticating it is from where it should be, have the bot do the things you want it to do: update a database, return some data, ping another user, etc. You know what you need the bot to do better than I do.
This was probably the part of this process that made me most want to write this blog post. Microsoft alludes to the required response format in its docs and gives examples for portions of it, but nowhere could I find an explicit example of the required response format. So here it is (again, in Python):
import json

return {
   "statusCode": 200,
   "body": json.dumps(response),
}
It’s ultimately pretty simple, but note that the status key needs to be named exactly “statusCode”, and that regardless of whether you are sending back a list, dictionary, or simple string, the response data needs to be dumped to a JSON string.
Setting Up the Teams Bot
Once you have your endpoint deployed and have a URL for it, you’re ready to set up your Teams bot. This is done on a per-team basis in the app. Choose the team where you want to deploy the bot, then click the three-dot menu buttons for that team:

Click into Manage Team, then click over to the Apps tab:

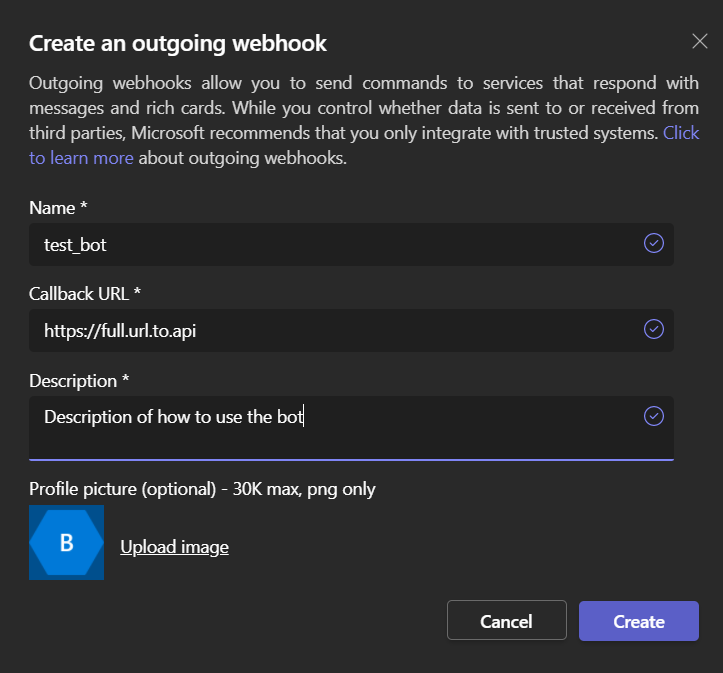
Then at the bottom-right corner of the window, click the button to create an outgoing webhook:

Then setting up the bot is as simple as giving it a name and description, copying in the link to the API endpoint, and optionally adding a small icon for the bot.
Once created, it will output a security token to use:
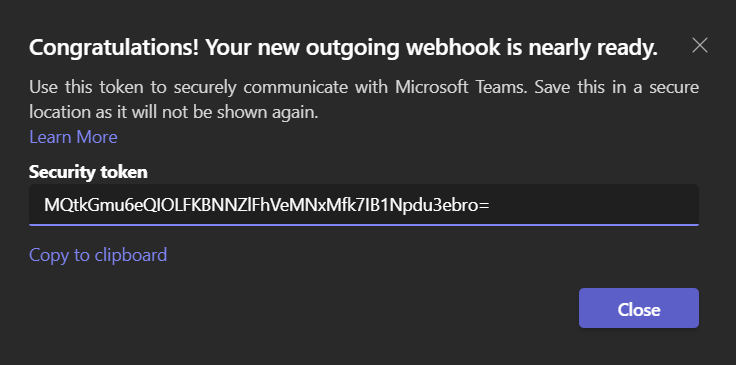
This is the token that you will need to be make available in the API environment to use for authentication. We’ve come full circle.
Now in the Teams channel where you set this up, you can call the bot by tagging it with @test_bot.
That’s it! Obviously there’s more to do building out program logic for these bots as well as handling API deployment, but this covers the Teams-specific items that should be able to get you (and future me) over the hump for future projects in this space.